Introduction
Craft enthusiasts rejoice! The innovative approach of Let’s String has taken the crafting world by storm with its unique creativity kit. This creativity kit transforms your favorite photos into breathtaking string paintings, making it a must-have for anyone looking to explore their artistic side.
String art isn’t just about aesthetics; it’s a journey of creativity and expression. Creativity kits like Let’s String play an important role in nurturing artistic talent, providing a platform for both beginners and seasoned artists to create something truly special. With easy-to-follow instructions and all the materials you need, it’s no wonder that Let’s String is gaining popularity among craft lovers everywhere.
In this blog post, we’ll walk you through how to get the most out of your Let’s String kit in just five simple steps. From unboxing your kit to proudly displaying your finished masterpiece, you’ll discover everything needed to embark on this exciting artistic adventure. Ready to unleash your creativity? Let’s dive in!
But before we do, let’s not forget the importance of creating a conducive environment for your crafting activities. A well-organized and aesthetically pleasing workspace can significantly enhance your creativity and productivity. If you’re looking for ways to transform your space into a more inspiring environment, consider checking out some tips on how to transform your space with cute bees book nook.
Step 1: Preparing Your Kit
Before you start your string art project, it’s important to get everything ready. This includes opening up your Let’s String kit and understanding all the pieces inside.
What’s in the Kit?
When you open the kit, here’s what you’ll find:
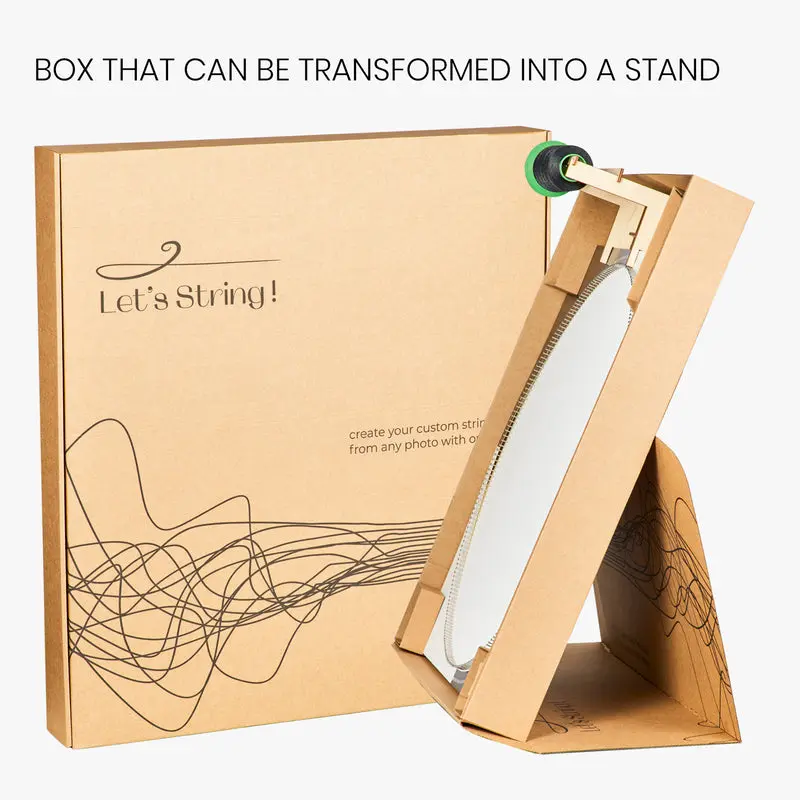
- Box Stand: This sturdy stand is your canvas holder, allowing easy access and visibility as you work.
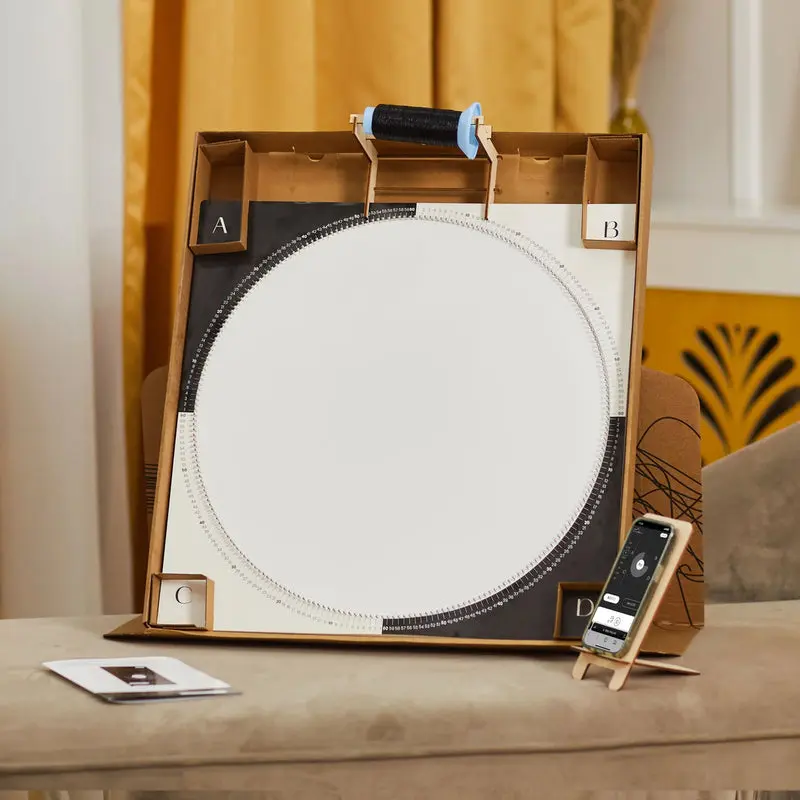
- Base with Nails: Pre-installed nails form the framework for your string masterpiece.
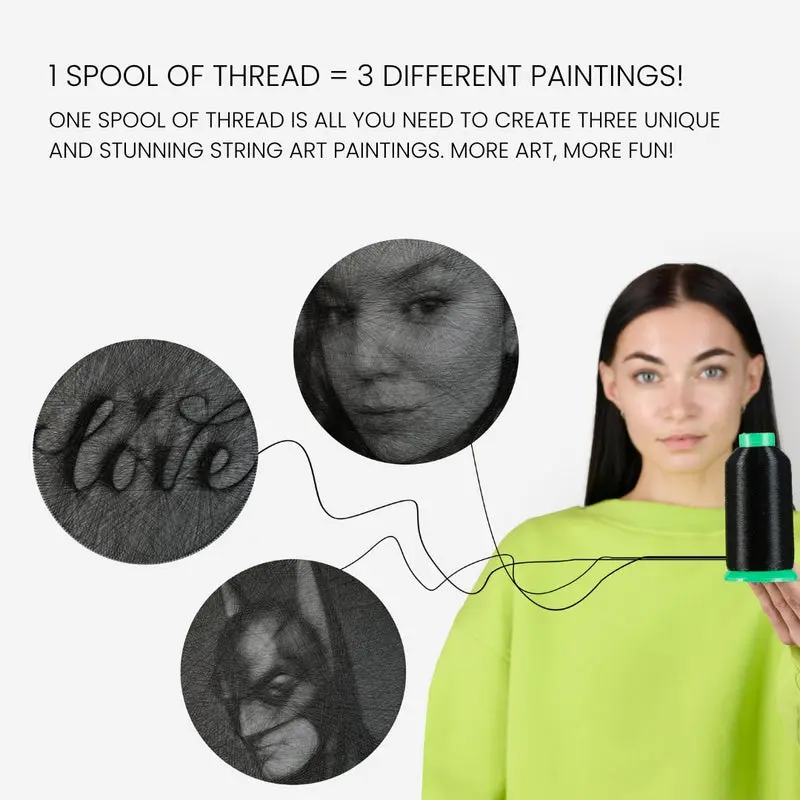
- Thread: A selection of vibrant threads, ready to transform into intricate patterns.
Why Understanding Each Piece Matters: Let’s String It Together
Knowing what each component does is crucial for a successful project. The kit comes with simple instructions that are easy to follow. These will help you set everything up correctly and make sure your crafting experience goes smoothly.
Taking some time to get acquainted with these parts will not only make your time spent on this project more enjoyable but also boost your creativity.
Think of this initial setup as laying the foundation for your string art journey. With everything prepared, you’re now ready to dive into the next step—choosing that perfect photo that will spring to life in colorful threads.
Step 2: Choosing Your Photo
Selecting the right photo is key to turning your vision into a beautiful string painting. Here are some tips to ensure your design is both unique and captivating:
- Choose High-Contrast Images: Photos with strong contrasts between lights and shadows enhance the string art’s visual impact.
- Clear Details Matter: Crisp, detailed images translate better into string paintings, ensuring every loop and thread tells a story.
- Focus on Simplicity: Complex backgrounds can overwhelm your design. Opt for images with a clear subject and minimal distractions.
When considering what makes the best images for string art, think about how the lines and patterns in your photo will transform under layers of colorful threads. Whether it’s a portrait or landscape, your chosen photo should inspire and excite you as you create your unique design. Embrace this step as an opportunity to set the stage for an unforgettable crafting experience!
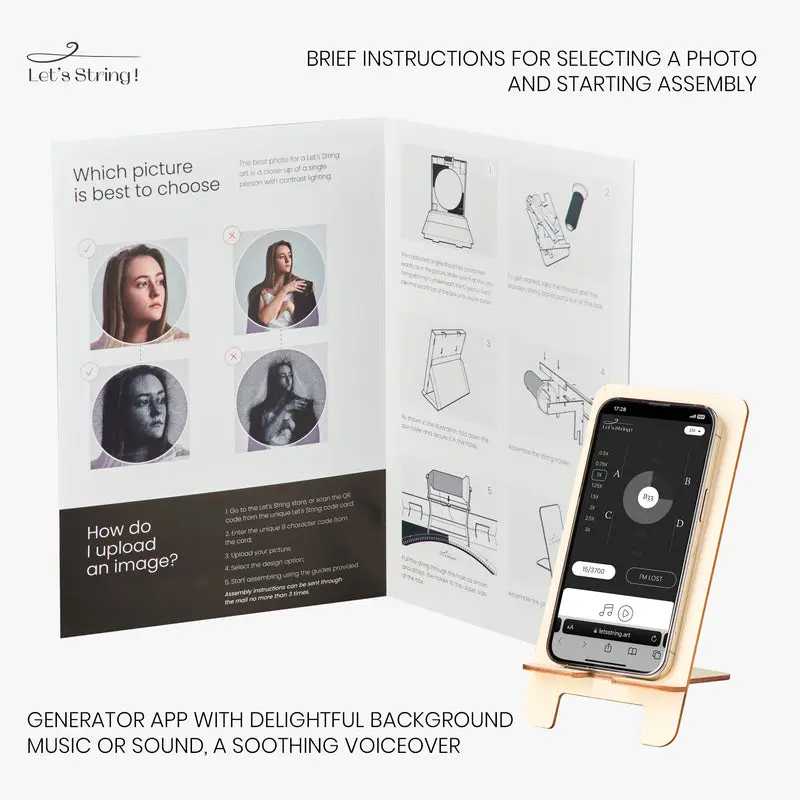
Step 3: Using the Online Generator
Get ready to bring your chosen photo to life with the Let’s String online generator. This intuitive tool transforms your selected image into a workable string art design with ease.
Accessing the Online Generator
- Launch the online generator: Visit the Let’s String website and navigate to their user-friendly online generator tool.
- You’ll find clear prompts guiding you through each step, ensuring a hassle-free experience right from the start.
Navigating the Features
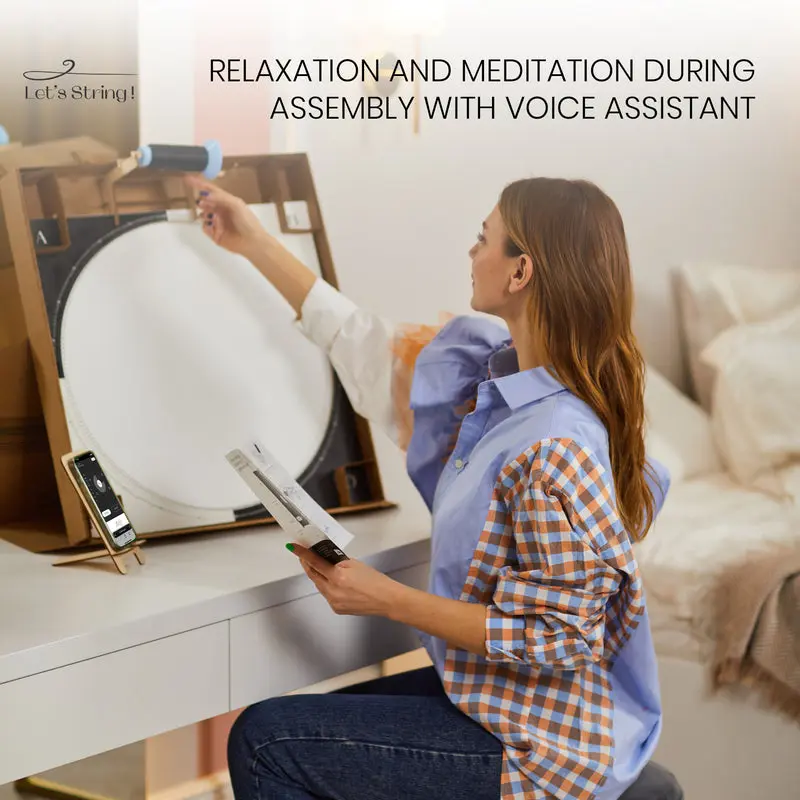
- Voice Instructions: Activate the voice assistant for real-time guidance. It’s like having a crafting buddy by your side, offering tips and encouragement as you go.
- Background Music: Enhance your crafting session with soothing background music, making the process not only creative but also relaxing.
The online generator is designed to make your crafting journey smooth and enjoyable. Don’t forget to check out reviews of Let’s String on platforms like Trustpilot for additional insights from fellow crafters!The online generator is designed to make your crafting journey smooth and enjoyable. Don’t forget to check out reviews of Let’s String on platforms like Trustpilot for additional insights from fellow crafters! Whether you’re a beginner or an experienced artist, the possibilities with string art are endless. So gather your materials, find that perfect image, and let your creativity unravel as you embark on this mesmerizing art form. Happy crafting!

Step 4: Creating Your Artwork with Let’s String
Now that you have your design ready and materials prepared, it’s time to bring your string art creation to life. Start by securing the pattern onto the base with pins or tape. Then, carefully thread the string through each pin, following the outline of your design. Experiment with different colors and patterns to add depth and texture to your artwork. As you work, take breaks to step back and admire your progress. Remember, string art is a process that requires patience and precision, so don’t rush it. Enjoy the therapeutic experience of weaving strings together and watch as your masterpiece unfolds before your eyes.Now that you’re set up and ready to go, it’s time to transform your chosen photo into a string art masterpiece. Let’s dive into the Let’s String technique to create stunning craft masterpieces.
The Process:
- Prepare Your Workspace: Ensure you have ample lighting and a spacious area to work comfortably. This will help you see the details and manage the threads without tangling.
- Follow the Template: Place the template over the base with nails. The template acts as your guide, showing where each thread should wrap around the nails.
- Start Stringing: Begin by tying one end of your thread to a starting nail. Carefully follow the pattern, wrapping the thread around each designated nail as indicated by your template.
- Maintain Tension: Consistent tension is key for a clean finish. Keep your thread taut but not overly tight to avoid bending or breaking nails.
- Finishing Touches: Once complete, secure the end of your thread tightly to ensure it doesn’t unravel. Remove the template gently, and voila! Your finished artwork is ready to shine.
Tips for Success:
- Patience is Key: Take your time with each step, allowing yourself to enjoy the creative journey.
- Creativity Counts: Feel free to experiment with different colors or patterns if you’re feeling adventurous.
- Troubleshooting Common Challenges: If threads become tangled, pause and address the knot carefully—rushing can cause more harm than good.
Enjoy the satisfying process of seeing your string art masterpiece come together! Craft masterpieces like these are not just visually appealing; they are also a testament to your creativity and perseverance.
Step 5: Enjoying and Displaying Your Masterpiece
Creating unique string art is a rewarding journey, and once you’ve completed your masterpiece, it’s time to show it off! Consider these creative ways to display your work:
- Home Display: Hang your string art in a living room or hallway to add a personal touch. It not only enhances the aesthetic of your space but also becomes a conversation starter.
- Personalized Gift: Share the joy by gifting your creation to someone special. Handmade gifts like these are cherished for their thoughtfulness and creativity.
Aside from its decorative appeal, crafting string art offers therapeutic benefits. The repetitive motion of threading can serve as a relaxing experience, helping you unwind after a long day. This craft’s meditative nature allows for introspection and stress relief, making it not just an artistic endeavor but a holistic one too.
Embrace this dual benefit by finding time in your routine to engage with this mindful activity.
Shipping Experience with Let’s String Kit
When it comes to receiving your Let’s String kit, shipping options and costs are key factors to consider. For those in Europe, enjoy the perk of free delivery, making it a cost-effective choice for craft enthusiasts. For customers in other regions, it’s crucial to evaluate shipping times:
- UK: Typically, expect deliveries within a few business days.
- US: Delivery can take slightly longer, often ranging from 7 to 14 days.
It’s always a good idea to check out customer reviews on platforms like Trustpilot. These insights can help you assess product quality and reliability before making a purchase decision. Such reviews often cover aspects like shipping time, packaging quality, and overall satisfaction with the Let’s String experience. By reading these reviews, you’re more informed about what to expect when your creativity kit arrives at your doorstep.
Conclusion – Unleash Your Creativity with Let’s String!
Discover your creative potential with the Let’s String kit, where every thread tells a story. This isn’t just a craft project; it’s a chance to express yourself in an art form that appeals to all ages. Whether you’re looking for a fun activity or a meaningful gift, this kit is ideal for igniting joy and creativity. Ready to begin your artistic journey? Buy Let’s String kit now and discover limitless possibilities! Don’t forget to review Let’s String and showcase your creations to the world!

