How to Use a Plasma Pen Safely at Home (Step-by-Step Guide)
Learn how to use a plasma pen safely at home in 2026: prep checklist, intensity settings, technique tips, aftercare routine, and when to stop and see a doctor.
Before You Start: Confirm You’re a Candidate
- Before You Start: Confirm You’re a Candidate
- Step 1: Do the Patch Test (24 Hours Before)
- Step 2: Prep the Treatment Area
- Step 3: Set the Intensity — Start Low
- Step 4: The Treatment Technique
- Step 5: Immediately After Treatment
- Aftercare: The Phase That Determines Your Results
- When to Stop and Seek Medical Care
- Common Mistakes to Avoid
- How Often Can You Retreat?
- Frequently Asked Questions
Knowing how to use a plasma pen correctly is the difference between a clean result and an avoidable complication. The device is simple to operate — but the prep and aftercare protocols matter significantly more than the treatment itself, which usually takes seconds.
This guide walks through every step: who should confirm they’re a candidate first, how to prep the skin, how to set intensity, what the technique looks like, and exactly what to do — and not do — in the days after treatment.
Disclaimer: Plasma pens are cosmetic tools for benign skin imperfections only. Read the full safety guide at Ocuralife’s safety page before first use. If any spot has changed in color, size, or border, see a dermatologist before treating.
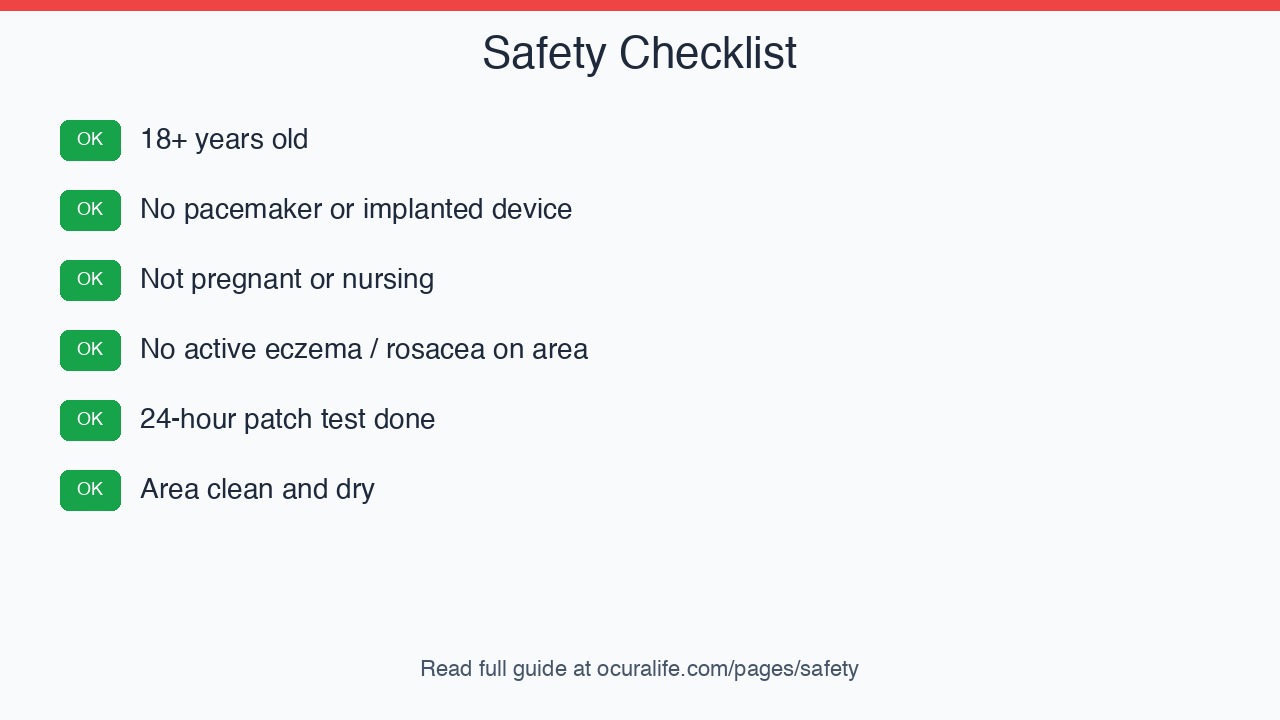
Before You Start: Confirm You’re a Candidate
Skip this step and nothing else in this guide matters. The Ocura Plasma Pen is not suitable for everyone. Do not use if you:
- Are under 18 or pregnant/nursing
- Have a pacemaker or implanted electronic device
- Have epilepsy, diabetes, or poor circulation
- Are on blood thinners, retinoids (including tretinoin), or isotretinoin (Accutane)
- Have keloid scarring history or immunosuppression
- Have active skin conditions (acne, eczema, psoriasis, rosacea) in the target area
- Have recently had a cosmetic procedure (wait at least 6 weeks)
Also confirm the imperfection you’re treating is benign. Any spot that’s changed recently — in color, size, shape, or border — needs to be evaluated by a dermatologist first.
Step 1: Do the Patch Test (24 Hours Before)
Every first-time user must do a 24-hour patch test on a small, hidden area before treating any visible location. This confirms your skin doesn’t have an adverse reaction to the plasma arc.
Choose a spot on your inner arm or another low-visibility area. Set the pen to its lowest intensity (level 1). Briefly contact one small point. Wait 24 hours. If you see only normal redness that fades, you’re clear to proceed.
Step 2: Prep the Treatment Area
On treatment day:
- Cleanse the area thoroughly — soap and water, no makeup, no serums, no oil
- Dry completely — plasma arcs and moisture don’t mix; pat dry and wait a few minutes
- Apply numbing cream (optional but recommended for sensitive areas) — apply generously 20–30 minutes before treatment, then wipe clean before using the pen
- Check the device — confirm the pen is charged (the LCD will show battery level), inspect the tip for damage, and verify you have a clean needle tip attached
Good preparation is what separates clean results from preventable skin reactions.
Step 3: Set the Intensity — Start Low
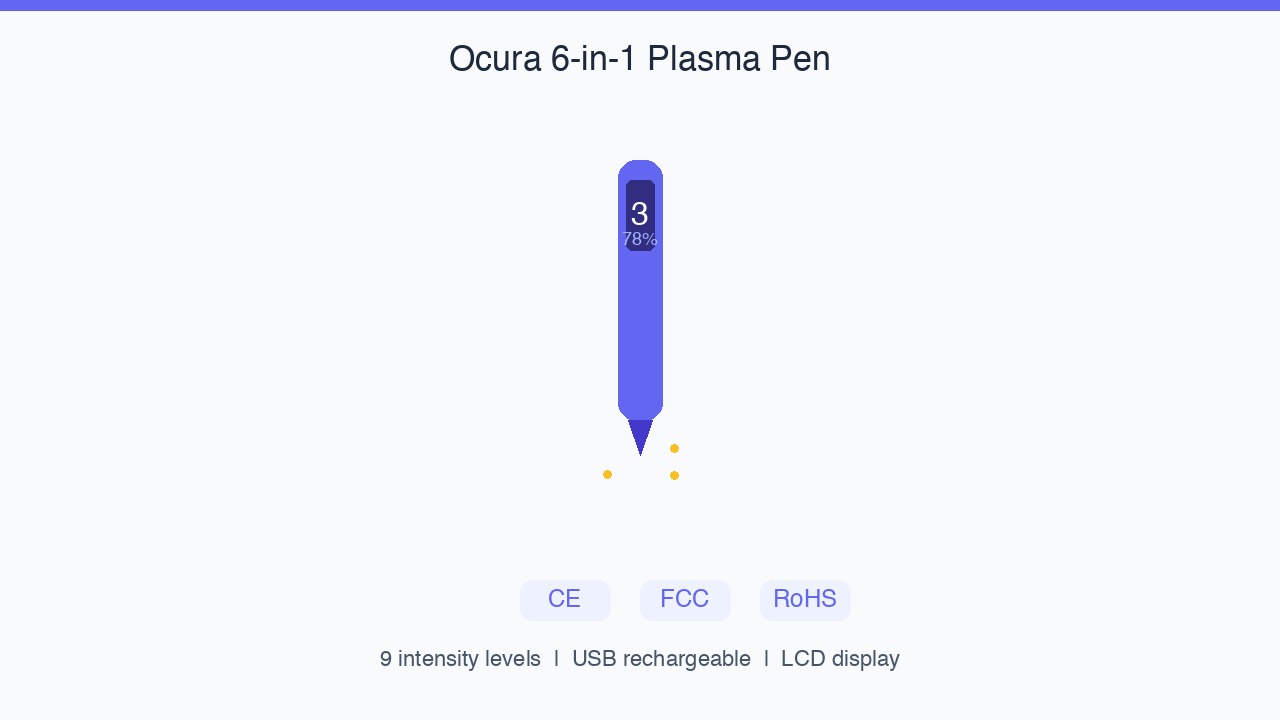
The Ocura pen has nine intensity levels displayed on the LCD screen. The right starting point:
- Level 1–2: Small, thin skin tags; first-time use; sensitive skin
- Level 3–4: Moderate-sized tags; cherry angiomas; repeat use
- Level 5+: Thicker imperfections; experienced users only; use with caution
Start at the lowest effective setting. You can always repeat a treatment at a slightly higher intensity after the first one fully heals (4–6 weeks). You cannot undo a setting that’s too high.
Step 4: The Treatment Technique
Hold the pen like a pencil. The tip should hover 1–2mm above the skin surface — it should not press against the skin. The plasma arc bridges the gap.
For a skin tag:
1. Position the tip near the base of the tag (where it attaches to skin)
2. Briefly activate — a fraction of a second per contact point is sufficient
3. You’ll see a tiny spark and may hear a faint snap
4. Move to the next point if treating multiple tags; don’t linger on one spot
Less is more on your first treatment. A faint darkening of the tissue is the correct result. Visible charring or a burning smell means the intensity is too high or the contact was too long.
Keep the pen moving — don’t hold it stationary over one point. Work in brief taps, not sustained contact.
Step 5: Immediately After Treatment
Right after treatment:
– Apply the Healing Patches provided (or clean, non-adhesive gauze) over treated areas
– Do not apply makeup, perfume, or any active skincare (retinol, AHA, BHA) to the area
– Avoid touching or rubbing the area
The treated spot will look slightly red or show a small dark point. This is normal.
Aftercare: The Phase That Determines Your Results
Aftercare is where most people go wrong. The treatment takes seconds; the aftercare lasts weeks.
The rules:
Do not pick or peel the scab. This is the single most important rule. The scab that forms on days 1–3 is protecting new skin underneath. Picking it off early dramatically increases the risk of scarring or hyperpigmentation. Let it shed on its own.
Apply SPF 50 every morning on the treated area for three months after treatment. Post-treatment skin is vulnerable to UV-triggered pigmentation changes. Skipping sunscreen is the second most common cause of discoloration.
Avoid sun exposure on the treated area for a minimum of four weeks. Cover with clothing if you’re going outside.
No swimming, saunas, or steam rooms for 14 days.
No strenuous exercise for 48 hours after treatment.
Keep the area clean and dry during the scabbing phase. Gently cleanse with mild soap and water; pat dry — don’t rub.
Day-by-day aftercare:
| Day | What to do |
|---|---|
| 0–1 | Healing patch; no touching |
| 1–3 | Leave scab alone; gentle cleanse only |
| 3–7 | Scab sheds; apply SPF when outside |
| 1–4 weeks | Daily SPF 50; no direct sun; no pool |
| Month 1–3 | Continue SPF; avoid active skincare on area |
When to Stop and Seek Medical Care
Stop use immediately and consult a healthcare professional if you experience:
- Excessive pain beyond brief discomfort
- Significant swelling that spreads beyond the treated area
- Signs of infection: increased redness, warmth, pus, or fever
- An allergic reaction: hives, itching, or facial swelling
- Scarring that extends beyond the treated zone
These are uncommon with proper use but warrant prompt attention.
Common Mistakes to Avoid
Skipping the patch test. Even if you’ve used similar devices before, always patch test on a new body area first.
Using too high an intensity. The instinct is to “get it done in one go.” Starting at level 3 on a first use when level 1 would work leads to unnecessary tissue damage and longer healing.
Picking the scab. Already mentioned, worth repeating. The scab looks worse than it is. Leave it alone.
Skipping sunscreen. The four weeks of SPF 50 aren’t optional — they’re the variable that most determines your final cosmetic result.
Treating an area with active breakouts. Wait until the skin is calm before treating any area that has active acne, eczema, or rosacea.
How Often Can You Retreat?
If a skin tag needs a second pass (common for larger or thicker tags), wait until the treated area has fully healed — typically four to six weeks. Attempting a second treatment before full healing increases the risk of PIH and uneven results.
For general skin maintenance using the pen on other imperfections, there’s no hard limit, but treating the same body zone more than once every six weeks is not recommended.
For a detailed look at the Ocura Pen’s hardware, what’s in the kit, and independent assessment of the brand, see our full Ocuralife review.
To understand the technology behind plasma pens and how they compare to dermatologist visits in cost, see our plasma pen skin tags guide.
Frequently Asked Questions
Do I need to charge the pen before first use?
Yes. Charge fully via USB before your first session. The LCD will show a full battery indicator. A fully charged pen ensures consistent output throughout your session.
Can I use the pen on multiple areas in one session?
Yes, but limit each session to a reasonable area. Treating too many spots at once extends the aftercare burden and makes it harder to monitor each treated site carefully. For beginners, treat one or two tags per session until you’re confident in the protocol.
The scab fell off early and the skin looks pink — is that okay?
Light pink skin under a shed scab is normal and expected. The concern is if you pulled the scab off before it was ready to go — in that case, extra SPF diligence and avoiding any additional irritation to that area is key.
My pen isn’t sparking at level 1 — what’s wrong?
The plasma arc requires a very small gap between the tip and the skin. If you’re pressing the tip against the skin or holding it too far away (more than 2mm), no arc forms. Practice the hover distance on a piece of paper first to calibrate your hand position.
Can I use the pen on a raised mole?
Ocuralife’s instructions specify the pen is for cosmetic use on benign imperfections. Any raised mole should be evaluated by a dermatologist before any home treatment. Do not use a plasma pen on anything that might not be benign.
How do I clean the pen after use?
Wipe the body of the device with a soft, dry cloth. Do not submerge in water. Clean or replace needle tips between sessions — Ocuralife’s replacement tip sets are available on their site.
Affiliate disclosure: This article contains affiliate links. We may earn a commission at no extra cost to you if you purchase through our links.
Recommended for you
 Best Ceramide Moisturizer Under $30: K-Beauty Picks That Outperform Luxury Brands
 Haruharu Wonder Review: The K-Beauty Brand That Strips Skincare Back to Basics
 Haruharu Wonder Ceramide Cream Review: K-Beauty’s Best $24 Pick?
 Best Men’s Hair Clay 2026: Which Formulas Actually Hold Without Crunch?
 Who Is Elijah Matt Clay: Is This Barber-Origin Formula Worth 28 Euros?
 Who Is Elijah Review: The Best Matt Clay and Cologne for Men 2026